
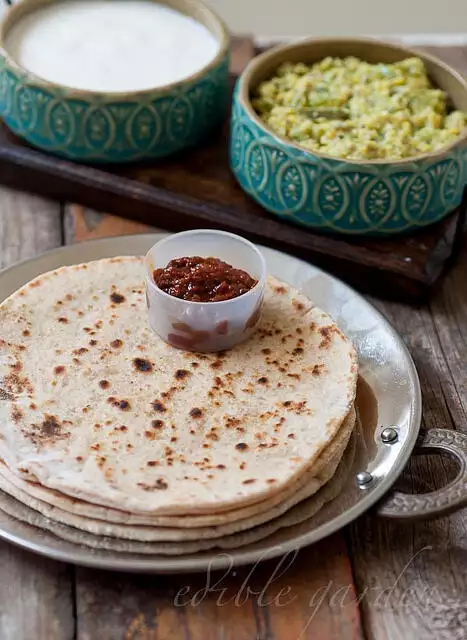
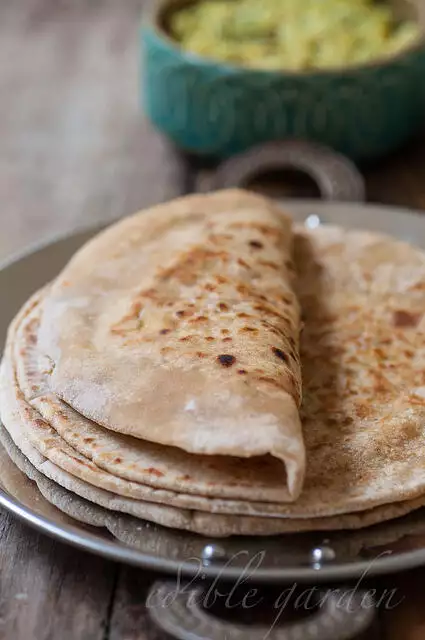
Paneer Paratha is a popular Punjabi paratha recipe. A delicious double-layer of paratha filled with spiced paneer or cottage cheese is our idea of bliss for a weekend meal. Learn how to make easy Punjabi paneer parathas using this easy step by step recipe.
I learnt how to make parathas quite late in life – especially the stuffed parathas like aloo paratha. When I tried gobi paratha for the first time, I used a different technique (check the post to see what I did) since I was worried my parathas will tear and all the filling will spill out, ruining my parathas and so, dinner for that night. So yeah, it does take practice to get paratha right but once you have done it a few times, parathas become much easier to make.
Paneer parathas are delicious and definitely work the extra time if you decide to use homemade paneer for the parathas. The filling can be spiced the way you like and there are different varations. I decided to keep it simple since anything too large in the filling can cause a tear in the paratha and I am quite paranoid about that.
I figured out, thanks to quite a few blogs and books out there, that one of the tricks to making smooth parathas without them tearing while rolling is to add some maida or plain flour to the atta while making the paratha dough. The extra elasticity that plain flour gives is truly magical and gives you a very pliable dough that’s more forgiving of a novice trying to make parathas at home.

You can adjust the proportions and go 100% atta if you’d like but if you are new to making parathas, then I highly recommend adding some plain flour to your dough and make your life a bit easier. It’s especially useful for Paneer Parathas since the filling will be a big grainy.

The good part about making parathas for lunch or dinner is that you don’t need very elaborate side dishes for them. Just a bowl of plain curd (you can make curd at home) and some spicy pickle will make the meal complete. I had some pudalangai kootu which I felt went fabulously with the paratha but I think that’s a bit of an abomination so don’t be like me and mix Punjabi parathas with South Indian kootu. Unless, of course, you really want to.
PS: I love paneer. Here’s a list of all Paneer Recipes on Edible Garden.
PANEER PARATHA RECIPE
Preparation time: 30 minutes
Cooking time: 20 minutes
Makes ~7 parathas
Ingredients:
For the dough:
- 1 cup of atta or Indian whole wheat flour (chapati flour)
- 1/2 cup of maida or all-purpose flour
- 1 tsp of salt (adjust to taste)
- 1-2 tsp of ghee or oil
For the filling:
- 2 cups of paneer cubes (how to make paneer at home)
- 3/4 tsp of red chilli powder (or use finely chopped green chillies)
- 1 large pinch of kasuri methi (dried fenugreek leaves)
- 1/2 tsp of powdered cumin or jeera
- A small pinch of omam or kalonji seeds
- A pinch of salt
- 1 tsp of oil
How to Make Paneer Paratha:
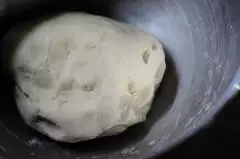
- First make the dough by mixing all the ingredients for dough in a bowl. Add about 1 cup water in intervals until a soft non-sticky dough is formed. I use my kitchen to make paratha dough and it works fabulous. Cover and set the dough aside for about 30 mins and make the filling in the meantime.
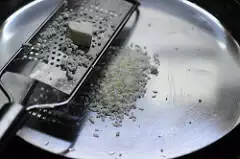
- For the filling: grate the paneer into a wide bowl. You can also crumble it with your fingertips but grating is best for making filling for paneer paratha.
- Add the rest of the ingredients for filling to the paneer and mix well. Cover and set aside.
- To make the parathas: pull out a lime-sized ball of dough and roll between palms into a smooth ball.
- Using the palm of your left hand and the fingertips of your right hand, form an even-sized ‘cup’ with the dough that can hold the filling. The process is very similar to how we make modak (see pics below).
- Add a lime-sized amount of filling in the centre of the cup and cover with the dough.
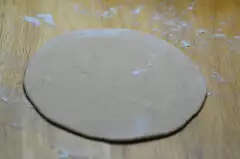
- Dust generously and roll gently into a 1/4″ thick circle
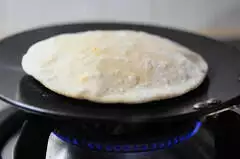
- Heat a pan or griddle and cook the paratha on medium flame until puffy and both sides have brown flecks
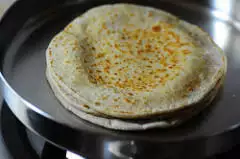
- Just before removing from the pan, brush both sides with ghee and transfer to a plate.
- Make the rest of the paratha and stack them up on top of each other
- Serve hot with plain curd and pickles.
Step by Step PIctures for making Paneer Paratha:
1. Mix the ingredients for dough with about 1 cup water and form a smooth yet non-sticky dough. Cover and set aside.
2. For filling, start by grating the paneer
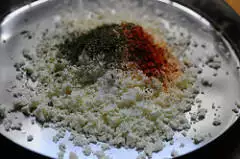
3. And add the rest of the ingredients. Mix well.
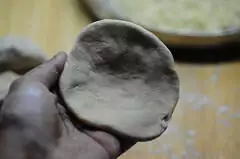
4. When ready to make the parathas, make a smooth ball out of a lime-sized amount of dough. Gently use your palm and finger tips to flatten it into a “cup”.
5. Place an equal amount of filling (equal to the size of the dough you used) in the centre
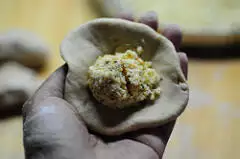
and seal with the dough.

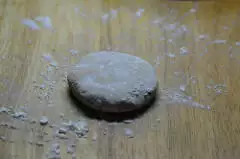
6. Flatten between palms and dust generously.
7. Roll into a 1/4″ circle. If there are air pockets while rolling, prick with a fork and continue to roll.
8. Transfer to a heated pan and cook both sides until it’s puffy
and brown flecks appear on both sides. Keep flame at medium and take care not to burn the parathas.

9. Brush the cooked parathas generously with ghee and stack them on a plate to serve.
Notes:
- Take the extra time to grate the paneer, please.
- You can add any spices of your choice to the filling. While I love the flavour of green chillies, they may cause the dough to tear as you roll, and also, biting into spicy pieces of green chillies is not our idea of a pleasant surprise.
- You can also lightly saute the filling in some oil and cool before using it. I think the parathas are delicious without that step so why bother. But that’s just me. You may want to try it.
- Adding some minced onions to the filling would be yum too.
- If using homemade paneer, it will be more moist than store bought ones. Make sure you freeze them for a while before grating, and if it’s very moist, squeeze out the excess water completely. You don’t want a soggy filling to work with, trust me. Sauteeing may help in this case, especially.
Leave a Reply