

Anyway, let's talk Egg Biryani now. This one turned out super delicious but it took a tad more time that I normally like to stand in the kitchen for. I believe from start to finish, including chopping and everything, this biryani took about 1 hour 15 mins. I like to finish all my cooking within an hour so yeah, this went slightly over, but then the advantage of making a biryani for lunch is that you don't really need a side dish except a simple onion salad or cucumber raita and papad or chips.

I took pretty detailed pictures and had to cut short a few to make the length of this post reasonable. It may seem like a lot more work than it actually is because this egg biryani has many pieces that finally come together into a single dish. Don't let that deter you. You can do a bunch of stuff simultaneously and I have written the order in which I cooked. Total time will depend on your speed on getting things done though.

Alright then, it's a beautiful day to make some Egg Biryani so let's get cracking. Check out more Biryani Recipes on Edible Garden if you have some time to browse around. My favourites are gobi biryani, soya chunks biryani with sprouts, and Amma's layered chicken biryani. Don't forget to whip up a mirchi ka salan to go with your biryani - yum!
EGG BIRYANI RECIPE
Preparation time: 15 minutes
Cooking time: 1 hour
Serves 2
Recipe: my own
INGREDIENTS:
- 1 cup of basmati rice
- 2 tablespoon + 2 tablespoon of ghee
- Half a fistful of whole spices like cinnamon, cloves, cardamom, star anise, and one bay leaf (use whatever you have in hand)
- A small bunch of coriander leaves (cilantro)
- A small bunch of mint leaves
- 2 green chillies
- 2-3 cloves of garlic
- 2" piece of ginger
- 1.5 cups of large onions, sliced long
- ½ cup of cubed ripe tomato
- ½ teaspoon of red chilli powder (adjust to taste)
- ¼ teaspoon of turmeric powder
- 1 teaspoon of jeera or cumin
- 1 teaspoon of fennel seeds or sombu (perumjeerakam)
- 1 teaspoon of coriander powder
- 2 cups of thick coconut milk (optional)
- 1-2 teaspoon of biryani masala or garam masala
- 1 teaspoon of ginger garlic paste (freshly made is best)
- 3 eggs
- ¼ cup of cashew nuts and more coriander leaves and mint leaves, for garnish
INSTRUCTIONS:
This is the order in which I made the egg biryani. Adapt to suit your convenience and time in hand. Check notes at the end of the recipe below for some tips on preparation ahead of time if you are making egg biryani for guests.
0. Wash and leave the basmati to soak in some water before proceeding with the next steps.
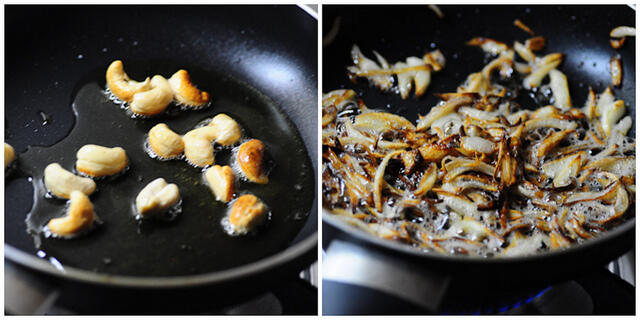
1. Start with a medium-sized pan and heat 2 tablespoon ghee. Add the cashew nuts and fry until golden. Drain and set aside.
2. To the same pan, add half of the sliced onions. Fry until golden, drain and set aside. We'll use these and the cashew nuts for garnish before serving.
2. Grind together - coriander leaves + mint leaves + green chillies + ginger + garlic + salt.
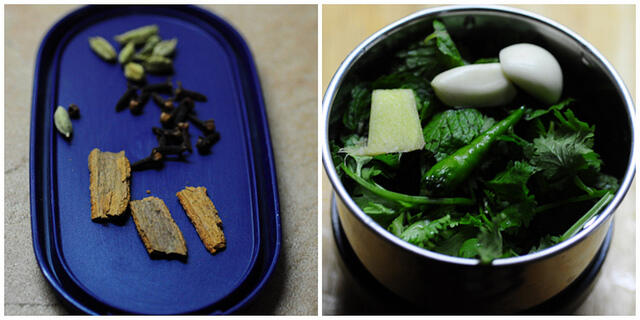
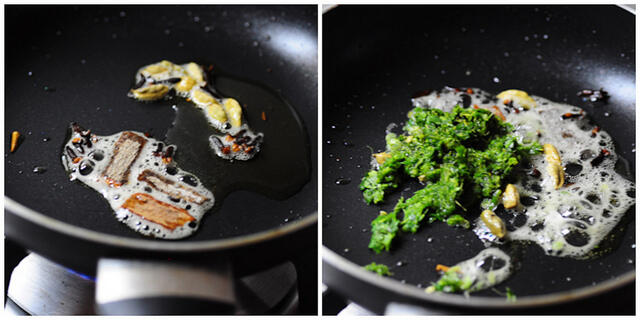
3. In the same pan with the ghee (add some more ghee if needed), add whatever whole spices you are using. I only had cinnamon, cloves, and cardamom.
4. Once the spices turn fragrant (about 15 seconds), add the ground paste and fry for another 30 seconds or so. Turn off flame.
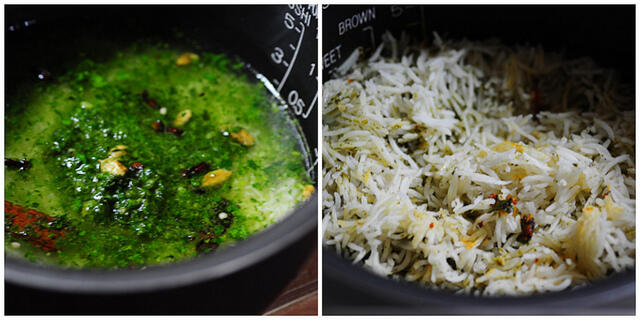
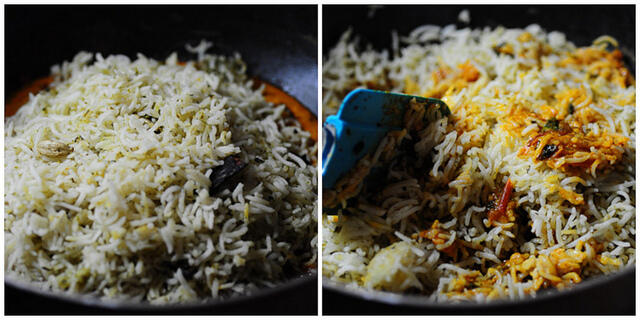
5. Add the soaked rice and this fried spice mixture along with 1.5 cups (adjust to your cooking method) to a rice cooker or pressure cooker. Leave it to cook while you proceed with the rest of the recipe.
PS: once the rice cooks, fluff it gently with a fork so it doesn't get more mushy.
6. Next, let's boil the eggs. I got this fail-proof method from Martha Stewart to make perfect hard boiled eggs. Place the eggs in a pan large enough to hold them without overlapping. Add enough tap water to cover them fully by an inch. Bring to a rolling boil, let it boil for 1 minute, and then turn off the flame. Cover fully with a lid and let it sit for 15 mins. Take eggs out and peel under running water. There you go - perfect hard-boiled eggs.
Let the eggs cook while you start off with the masala part of the egg biryani.
7. Heat 2 tablespoon ghee and add the remaining sliced onions. As they begin to brown, add the ginger garlic paste and saute for 10 seconds.
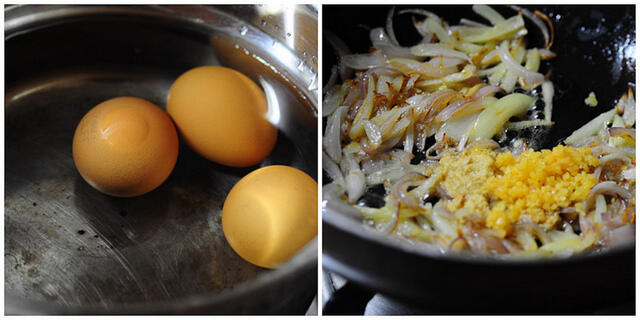
8. Next, add the spices and powders - coriander, turmeric, fennel seeds, cumin seeds, chilli powder. Saute until they are roasted, about 10 seconds. Top off with the chopped tomatoes and more coriander leaves and mint leaves (this is optional, I happened to have a lot of them fresh in hand so wanted to use it up.
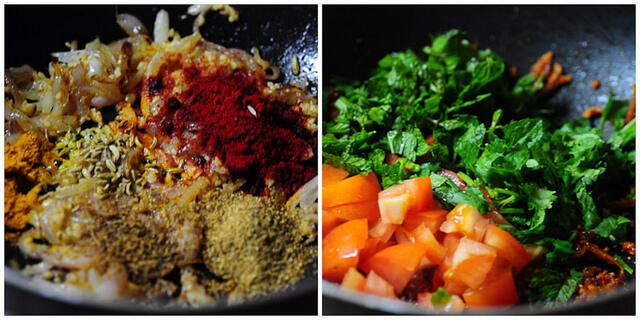
9. Saute until the tomatoes turn soft and mushy and the mixture is cooked. This will take about 5 mins or so.
10. Next, add the coconut milk. You can also use water instead of coconut milk, I just happen to love biryani made with coconut milk. If using coconut milk, add the 2 cups + ½ cup of water just to thin it out a bit.
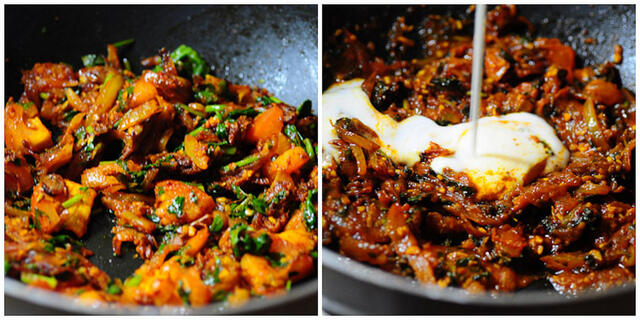
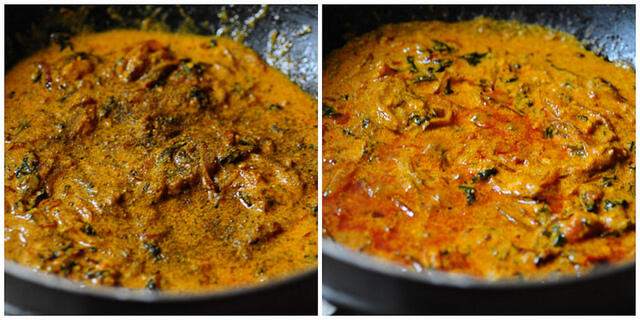
11. Let the mixture simmer on low flame for about 10 mins until the masala becomes thick-ish. Add salt and garam masala or biryani masala now, mix well, and turn off flame. The ghee will be visible on top of the masala. That's when you kinda know it's done.
12. Almost done! Mix the cooked rice to the masala until nicely combined. If you want the marbled look, don't overmix, just lightly mix for an uneven look.
13. Add the sliced, boiled egg on top and cover with rice. Pat down tightly and cover. Let the biryani sit for atleast one hour for the flavours to blend.
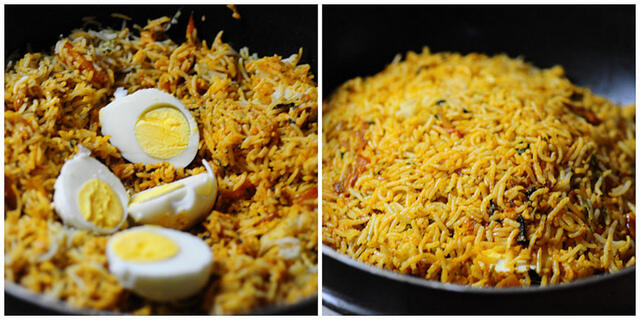
Garnished with the fried onions, cashew nuts, and more coriander leaves before serving.
Notes:
- You can do some of the preparation ahead for making egg biryani, especially for a party or guests
- Boil the eggs in advance and leave in the fridge unpeeled. Peel and slice before you need to use them.
- There aren't many vegetables to chop but slice onions and keep them ready.
- You can also pre-cook the rice and refrigerate it. Heat it along with the masala and it should work fine. This will also allow the rice to stay as separate grains.
- Serve egg biryani with a simple raita and papad or chips
For Egg Biryani recipe in Hindi, Tamil, Telugu, Urdu, please use the Google Translate button on the top right of this website.

Shana
Just cooked this for the family. Really good, everybody loved it
Recipe Kitchen
I made it at home, it is a very tasty and royal dish.
Beula Jose
Oh my lovely recipe! I’m a beginner at cooking, this was the best I did so far. Thanks!
nags
yay! thanks
Lakshmi
I was craving some biriyani and the nearest decent biriyani place is 40 minutes away so decided to make this recipe. Husband kept coming into the kitchen because o the aroma. It tastes amazing! Craving satisfied! Love all your recipes that I have tried so far.
nags
i am so glad to hear that, thank you Lakshmi!
Babara
Which biryani masala did u use? Besides garam masala .
nags
any brand biryani masala will do. i usually buy Eastern brand
Purnima
Tried this one today and was YUMMMA YUMMMMMAA!!!! Never has my biryani been so delectable! Also have tried other recipes too which turned equally great! I wish I could insert a photo here! Love!
nags
thank you so much purnima! you can email me your photos at naagu.v at gmail.com
chan
Hi ,tried this recipe today...and it turned out really well...thanks for sharing
very yummy:)
Suboohi khan
Heyy. I love u for dis biryani. Cooking was n still a nightmare for me. After marriage dis was the first thing in my xooking which turned out to b esooooooooo damnn delicious.. dat my Mr. Hubby fell in luv wid dis egg biryani. N my parents neva thot of ... dat i can cook dis yummmm.... all thankzz to u lady..
nags
That's great to hear! Keep cooking 🙂
Anonymous
i will be making this for my clients tommorow hope it works out well..