
Dosa is soul food for me. I often tell The Husband how I can make and eat dosa every day for a long time and still not be bored with it. It’s probably because we ate a lot of dosa growing up. Our family, or rather the Reddiar community in Kerala, always has homemade dosa batter in the fridge, ready to whip up fresh dosas on demand or for the unexpected guests whom we always insist stay for dinner.

My mom has been using an industrial sized wet grinder for many years now and it is run about twice a week to keep the idli/dosa batter supply ongoing and fresh. We make idlis as soon as the batter ferments and then dilute the batter further to make dosas for the next 3-4 days. Dosa also needs batter that’s more fermented and sour than idlis.
Check out this post for all tips and trips on how to make soft idlis with idli batter. Also check out barnyard millet dosa recipe.
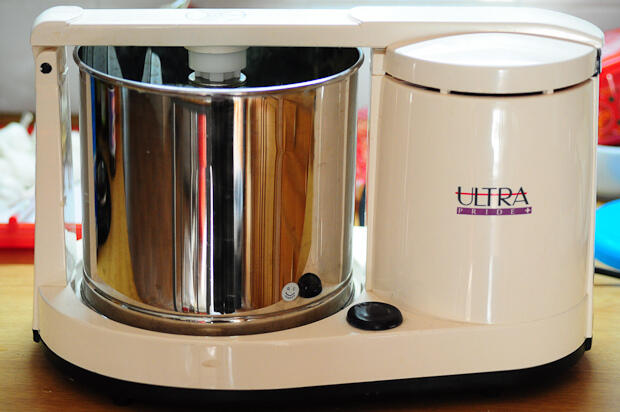
I use a table-top wet grinder for making dosa batter, pictured below. It’s the brand Ultra and has served me well now for 10+ years. It makes enough batter for a small family of four to last 4-5 meals and is perfect for us. Remember to use skinned, whole white urad dal and specific idli or dosa rice to make dosa batter at home.
About Dosa
Dosa is arguably the most popular South Indian breakfast recipes, with its own variations and recipes used and passed down from generations. The way we make the batter is very simple and uses only two ingredients apart from salt – whole urad dal and par-boiled rice. There are certain versions of dosa batter that include aval or poha (flattened or beaten rice), fenugreek seeds, cooked rice, etc. We do none of that and just reply on urad dal : rice in 1 : 3 ratio.
The dosa batter recipe can be scaled easily but if you use 1 cup urad dal and 3 cups rice, that is enough to make dosas for a family of four for 2 meals approximately.
Plain Dosa Recipe With Homemade Dosa Batter
Ingredients
For the dosa batter
- 1 cup whole, skinned urad dal
- 3 cups par-boiled rice stores sell this as Idli rice too
- 1 tablespoon Salt
To make dosas
- 4 cups of fermented dosa batter
- 1 cup of water more or less
- 4 tbsp of gingelly oil Indian sesame oil
Instructions
To Make Dosa Batter
- Soak the rice and dal separately for 3 hours
- Grind dal first into a smooth consistency adding enough water
- Grind rice into a smooth batter by adding just enough water to get it going
- Combine the two, add salt, and let it ferment in a large enough bowl lightly covered, for about 6-8 hours in a warm place
- * You can increase rice to four cups if using good quality urad dal but it takes experience and practice to tell if that’s the case so go with these proportions as you start out
To Make Dosa
- Add enough water to the fermented batter until you have a smooth, pouring consistency. Make sure the batter is not too watery though, it should be thick-ish but fall off your spoon easily.
- Heat a tawa or iron griddle and grease with the oil lightly. Pour about 1/2 cup batter to the centre of the tawa.
- Using the back of your ladle, gently spread the batter with a circular motion from the centre towards the sides of the tawa.
- This requires some practice but is not hard at all. As you can see, I have made dosas enough times to actually do a decent job with my left hand while taking pictures with my right. Ok, I’ll stop showing off now.
- Since we are not making very crispy dosas, don’t spread it too thin. The dosa should be more or less evenly thick.
- Drizzle about 1 tsp of oil around the edges of the dosa and add a few sprinkles on the top as well.
- If your tawa is greased adequately and is not sticky, the edge of the dosa will start to come off the pan in about 1 minute or so. Use a spatula to gently lift the dosa
- and flip it over. Cook the other side for another 40 seconds or so and remove from pan.
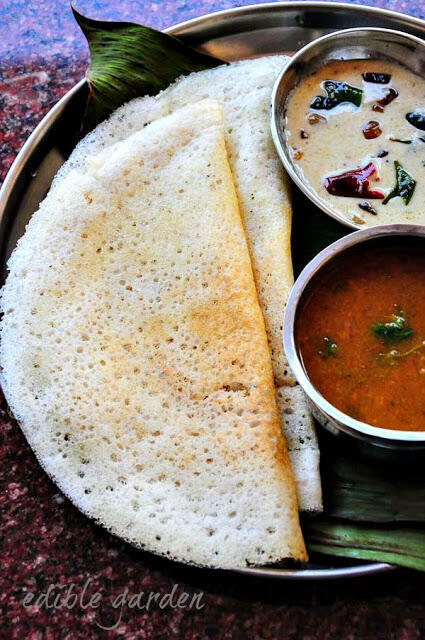
- Serve with dosa podi, chutney, sambar, tiffin sambar, or anything that takes your fancy. I can eat dosa with pretty much anything!
Step by Step Pictures to Make Dosa:
1. Add enough water to the fermented batter until you have a smooth, pouring consistency. Make sure the batter is not too watery though, it should be thick-ish but fall off your spoon easily.

2. Heat a tawa or iron griddle and grease with the oil lightly. Pour about 1/2 cup batter to the centre of the tawa.

3. Using the back of your ladle, gently spread the batter with a circular motion from the centre towards the sides of the tawa.

This requires some practice but is not hard at all. As you can see, I have made dosas enough times to actually do a decent job with my left hand while taking pictures with my right. Ok, I’ll stop showing off now.

Since we are not making very crispy dosas, don’t spread it too thin. The dosa should be more or less evenly thick.

4. Drizzle about 1 tsp of oil around the edges of the dosa and add a few sprinkles on the top as well.

5. If your tawa is greased adequately and is not sticky, the edge of the dosa will start to come off the pan in about 1 minute or so. Use a spatula to gently lift the dosa

and flip it over. Cook the other side for another 40 seconds or so and remove from pan.

Serve with dosa podi, chutney, sambar, tiffin sambar, or anything that takes your fancy. I can eat dosa with pretty much anything!

Notes and FAQs
Q: Why does my dosa stick to the pan?
A: There are a few reasons for this:
1. The pan – use a well-greased pan – if your tawa is new, you need to season it to make sure it’s ready to make dosas. Using a non stick pan works but in my opinion, the dosas turn out dry. Use a pre-seasoned iron tawa and you will be fine.
To grease a dosa pan properly, use anything you can dip into oil – like a piece of onion, potato, a wooden spoon, etc. Dip into the sesame oil and rub generously all over the pan. If you pour drops onto the pan, then spreading the dosa will be difficult so always grease fully and don’t pour the oil before spreading dosa.
2. Keep it exclusive – never use a dosa tawa to make chapatis or anything else. Keep one pan exclusively for dosa. I have noticed that people who are new to making dosas add way too little oil. Be generous, a few drops are not enough.
3. Batter has too much water – this makes cooking times longer. If you have more fermented thick batter in stock, add it to the batter you are using, or, just lower flame and be patient. Make sure your flame is not very high. Medium-low heat is perfect for cooking dosas and you may need to adjust this on and off as the pan gets hot and cold during the cooking process.
If the above reasons are checked, then it’s possible that your batter is too old and sour. That’s another reason why it would stick to the pan.
Q: Why is my dosa batter grainy?
A: You didn’t grind the batter to a smooth consistency, that’s why. Remember to soak the rice and dal for enough time and grind it to a very smooth consistency before fermenting. An Indian mixie or a good blender is enough to make small quantities but a food processor likely won’t give you a smooth batter. A wet grinder is obviously the best option for making dosa batter at home.
Q: My dosa is white even after it is cooked. Why?
A: Couple of reasons that could be contributing to this – your batter is too cold – just bring it to room temperature before making the dosa – or, the proportion of rice in your batter is too high. Adjust proportions next time you make the batter. Conversely, too much dal in your dosa batter will contribute to dosas that are too red in colour. Adjust accordingly in your next batch.
Q: My dosas are very sour. Why?
A: Your batter is over-fermented or too old. If you have some wheat flour (atta), add it to the old batter and make semi-wheat dosas. Another trick is to add equal amounts of fresh batter and make dosas. Masala Paniyaram is another way to use up old dosa batter.
Q: How much salt should I add to the dosa batter?
A: I actually don’t measure salt each time but noticed that I end up adding a heaped teaspoon of salt to the 1 cup dal and 3 cup rice proportion of batter. You can taste the batter and see if it seems salty enough. Adding enough salt is important for right amount of fermentation.
Q: How do I ferment dosa batter in a cold place?
A: The most fail-proof method is to use your oven if you have one. Keep the batter covered in a bowl and turn the oven on about 40C and leave overnight. This will ensure your batter gets enough warmth to ferment.
If you don’t have an oven, leave in the warmest part of your home or near a source of warm heat (not direct heat) or in a heated room.
Q: How do I use store-bought dosa/idli batter?
A: The quality of store-bought batter really varies a lot. I have tried a few different brands in Singapore and have had different experiences. One thing that’s common is, although they all claim to also make good idlis, they don’t. So don’t waste your time making idlis with store-bought batter. Dosas, however, have turned out good for me. Most batters need you to add some water to bring it to the right consistency. Use up all batter within 3 days, they don’t last as much as homemade batter.
They also freeze well even if the package says not to freeze dosa batter.
Q: What about variations to the dosa batter – like adding poha, cooked rice, quinoa, brown rice, etc?
A: I make dosa batter the plain and simple way as mentioned above. I do plan to experiment a bit though but be patient with me, will share them as I get to it.
Q: Can I freeze dosa batter? How do I do that?
A: Yes! I make double batches often and freeze half the batter. You need to make the batter, let it ferment and then transfer the necessary quantity to an airtight container and pop in the freezer. When you need to use it, thaw in the refrigerator for a few hours or overnight. Add water as needed and voila! Your dosa batter is as good as new.
Since dosa batter in the fridge can turn sour after a few days, freezing is an excellent way to make more batter in one go and save some for fresh dosas at a later time.
If you have any more questions on making dosa at home, please leave it below in the comments and I will get back to you. Between my mom and me, we should be able to answer them 🙂 The above questions were compiled after a short poll I did on my Facebook page and hopefully they represent most of your personal questions on making dosa at home.
If you found this post useful, please pin it or share it with friends. Thanks!
Thorough and logically organized step-by-step guide.
Sir I am bignner for making dosa but I have tried a lot I didn’t get more.my dosa stick in the cast iron tawa.i have greased many time but I couldn’t make any dosa like restaurants.plz give some tips for making dosa crispy.
temperate of pan is also important. try a non stick pan first and see how that goes
Thank you very much for your recipe. I lost my wife a few months back. My children like dosa. I was a novice and came across your recipe. Children like the dosa I make. If you have any other breakfast recipes please email me.
The recipe seems simple, straight forward and friendly! How critical is using urad dal versus other types of lentils (such as red)?
absolutely critical. nothing else would work remotely the same 🙂
Amazing. Thank you for going into such detail about making dosa. Got a stupid question. Can I substitute rice with rice flour? Don’t see a reason why I should not.
no that won’t work. rice flour is made with raw rice and the rice used here is par-boiled rice. the consistency and dosa texture will be totally off
Hi..i.made idly.made from.batter using urad dal.and.idly rava. However when I tried making dosa with the same.batter the next day, it was sticking to.d pan..I.tried 3 different pans..can.u pls tell.me what did I do wrong. I have made Sosa’s in d past but with urad Dal,rice and methi( followed Ur recipe) . Didn’t have a problem.then. also I don’t have wet grinder at home(here at UK) I am.born and brought up in Andhra Pradesh so have always loved idly and dosa..but we would.mostly get it from.d Tiffin centre as my.mom didn’t know to make .later ofcourse she learnt to make dosas but is not an expert 🙁
idli rava does tend to stick a bit so make sure your batter is not too watery and the pan is properly greased with lots of oil
Wow. I think I would enjoy dosas or idli though the problem is finding’idli rice’ and sometimes, even Urad dal here in the Philippines, I’ve located the Urad dal but unfortunately, having a wet grain grinder is not readily available here. Consequently I would need to use my Braun wet spice grinder which doesn’t hold much more than a cup at a time. Might be enough but making fresh dosas here would be a challenge.
i am not Indian…. but want to make dosa. I have no idea what “idli rice” is. Can i just use good quality short grain rice?
you need “par-boiled rice” for dosa batter and not “raw rice”. or rather, you can make dosas with raw rice too but the recipe is different and this one calls for the specific kind of rice that’s boiled in rice processing. if you really want to ensure success, i’d recommend visiting an indian store to get the right type of rice. or you could experiment with the short grain rice and see how that goes 🙂