
I did too, for a really long time. Then I went and did something about it.
I had bookmarked DK’s recipe from Chef in You ages ago and kept going back to it hoping to recreate it soon. Then one rainy day I decided it has to happen today!
It could be the humidity or the yeast or the kind of flour I used but her measurements did not work for me. I had to add a lot more flour and still ended up with a super sticky dough. I improvised, gulped a few times expecting all that flour and other ingredients to go into the bin, but magically, it turned out great! You may also like this pizza base recipe and melon pan bread, a popular Japanese bread.
I am sharing the proportions I used with a heavy disclaimer that you may need to adjust the ingredients and their quantities as you go. Ready?
Indian Pav Bread Recipe
Preparation time: 2 hours
Cooking time: 25 minutes
Makes 10-12 rolls
Loosely adapted from Chefinyou
Ingredients:
3 cups of all purpose flour
3/4 cup of atta / chapati flour
2 1/4 tsp of instant yeast (one sachet)
1 cup of milk
1 of egg
1 tsp of salt
1 tbsp of sugar
3 tbsp of butter
2 tsp of melted butter (for brushing on pav before baking)
1/4 cup of warm water
How to Make Pav Bread
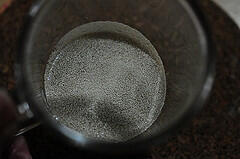
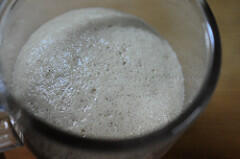
1 Add the yeast and sugar to the warm water and set aside until it turns bubbly and froths up – about 15 mins or so. If your yeast mixture doesn’t froth up like below and smell awful, you need to buy new stock.
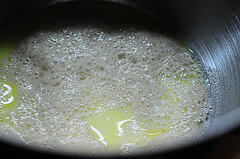
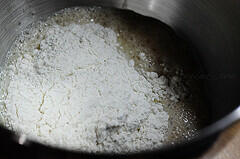
2. Warm the milk and add the butter and egg to it. Beat until combined. Add salt and the yeast mixture to this.
3. Add the flour a little at a time to this mixture and mix gently.
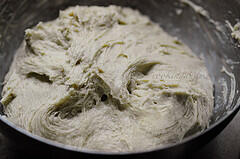
Once all the flour has been added, knead gently until the mixture comes together. I used my stand mixer for this but you can also do this by hand. Flex those muscles, that’s the best part of bread-making, I am told!
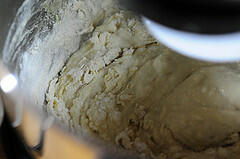
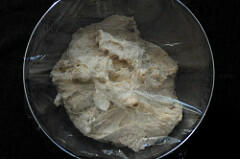
4. I got a pretty sticky dough at the end of this. If you notice DK’s pics, her dough is very smooth. Either ways, it’s going to turn out fine so don’t worry. Transfer this dough to a lightly oiled bowl, cover with a cloth or cling wrap and set aside to rise.
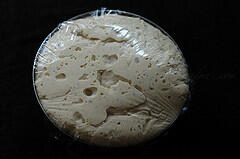
After about 2 hours, my dough looked like this. Gorgeous, eh?
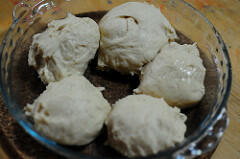
5. Punch it down gently…
… and pinch off large tennis-ball-sized balls and place on a greased baking dish, barely touching each other. Leave some space for the rolls to rise, but not too much.
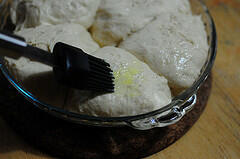
6. Set side until doubled in size – about 30 mins to an hour. Brush with melted butter.
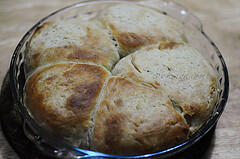
7. Bake in an oven pre-heated at 350F/180C for ~ 25 mins. The top should turn a nice golden brown. My oven has temperature variations inside so that’s why one side is slightly overdone than the other. Rotating the pan while baking will help minimize the effect of this. I am just lazy to do that, don’t be like me.
You can brush some more butter on top when it’s fresh out of the oven.
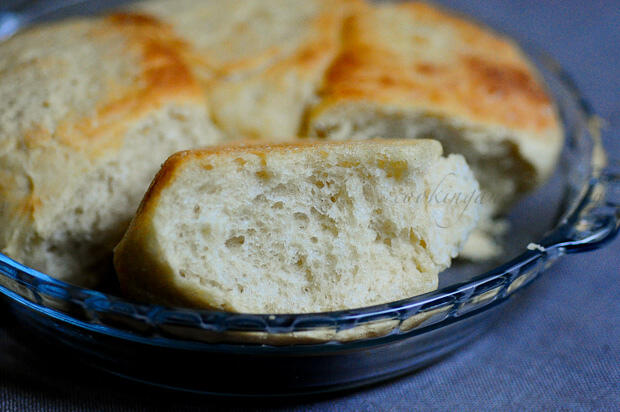
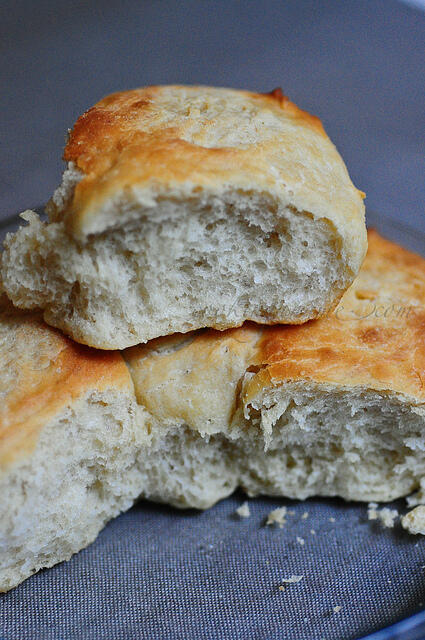
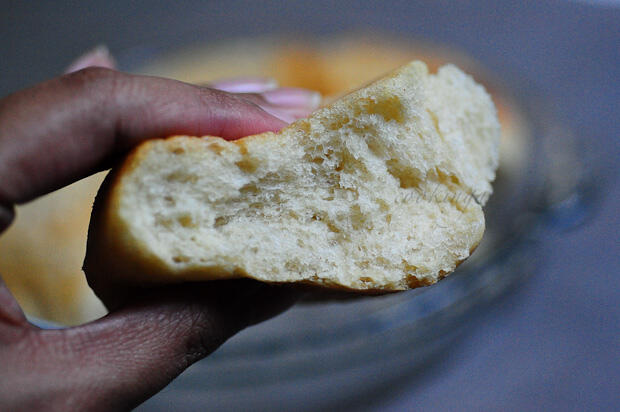
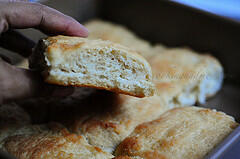
Super soft rolls are ready to be devoured along with your favourite bhaji (pav bhaji) recipe.
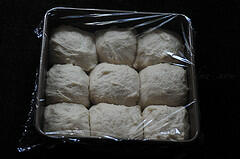
I want to leave you with some stuff I learned while baking pav so the pics below are your reference on what not to do while baking pav. I had laid out most of the rolls in a square baking tray. However, I left too much space between the rolls. After rising, they spread out too much resulting in flat (although delicious) pav. Don’t make that mistake, ok? Leave not more than 1″ max between the rolls before you let them rise before baking.
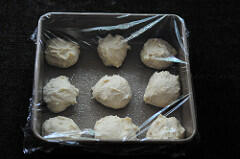 |
| Too much space between the rolls before baking |
 |
| Too flat |
Don’t you love it when you can learn from others’ mistakes and not have to go through the same yourself? Yeah, me too.
hi, i'm a vegetarian and would appreciate if you could confirm whether we could omit using the egg you mention in the recipe and if it would still turn out good. Thanks a lot!
no in this pav recipe, you need the eggs
hello..i have tried making these yesterday..but they came out hard..can u tell me what might be the prob? yours look so soft
a number of things could have gone wrong. did you use fresh yeast?
i have tried making these buns yesterday..but they came out hard..can u please tell me what might be the problem?yours look soo soft..
I have never made pav at home . Will surely try these.
Ummm thy look yum,,will try these some times,,,:)
I made these yesterday.
Well… I intended to make them, but for some bizarre reason I accidentally used besan (chickpea flour) instead of atta.
But they actually turned out fine – 'heavier' than pav should be, but they had a great flavour, and went really well with the bhaji I made.
oh wow, bread with besan, that's interesting!
Nags, I loved the bit about what not to do (with pics), yes, the bread looks lovely… but the fact that you still decided to put it and let us know from your mistake… hmm..! now that is something else! You go girl (Thumbs up) 🙂
aww thank you 🙂 i don't want anyone to make the same mistake i do. i don't always claim to be an expert you see. in most cases, i am making these recipes for the first time myself 🙂