
When I started off food blogging, I used powerpoint to add watermarks, borders and banners to my pictures. It was simple and I used powerpoint so much at work that it didn’t seem like much of an extra effort to me. As soon as Picasa came up with the feature to add text to pictures, I slowly moved away from powerpoint.
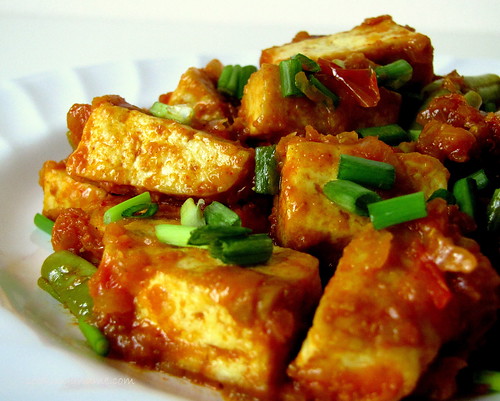
But, I still use it to jazz up my pics a bit, add a border and make it look a bit different, maybe like a cookbook cover which is what a lot of you said after seeing this picture of mine 🙂
So let’s see how we can make this picture..
 .. look like this in a few easy steps.
I recently upgraded to MS Office 2007 so this tutorial is using 2007. That really shouldn’t be a problem because all the features we are using to do this is very much available in 2003 and older versions too. The menu options may be different so I have tried to highlight those here. I am doing this from memory so please bear with me 🙂
1. Ok so let’s start with opening Powerpoint (Ppt).

Ppt 2007 users click on the ppt icon from your start menu.
Ppt 2003 users.. err.. do the same 😀 (ok, lame joke)
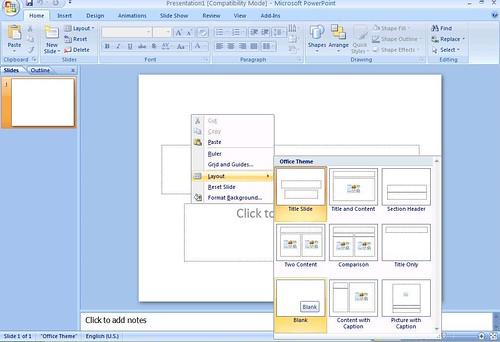
2. I usually like to work on a plain slide but that’s just me. This is not a necessary step but just nice-to-do. So if you’d like to work on a plain slide,
Right click on the slide –> Layouts –> Choose blank layout
For 2003 users, the layouts will open on the right hand side of the page.
3. Next, we need to open the picture we want to edit. For that, click on,
Insert –> Picture –> and browse for the picture in your computer.
For 2003 users, the options are the same except that you would need to specify ‘picture from file’ before you can browse and add it on.
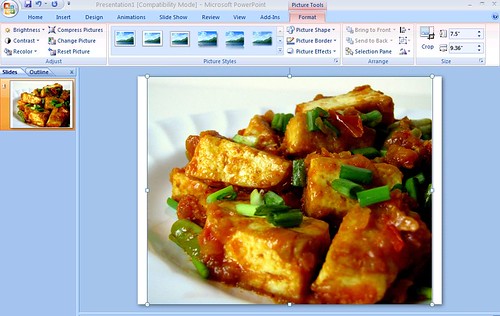
So here’s our picture, ready to be worked on. Notice the extra white spaces from the slide on both sides? Don’t let that bother you too much, we are going to get rid of it at the end.
4. Next, we need to add the basic rectangular banner on which we can type our text. For that, go to,
Insert –> Shapes –> and pick the rectangle from the list
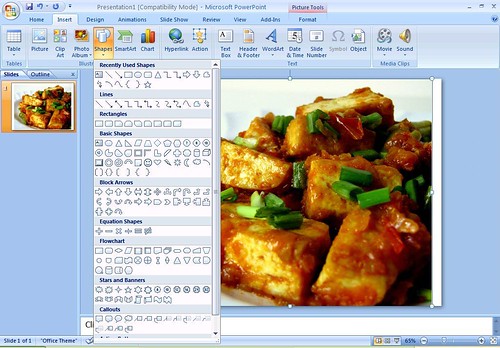
For 2003 users, you should be looking for basic shapes. You will find the rectangle in a toolbar at the bottom of your slide. Click that and we are good to go.
5. Drag and draw the rectangle to the desired size.
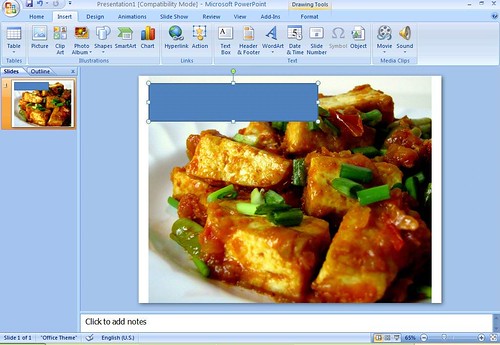
You can decide to put it in the top centered, to one side like I have done, at the bottom to the right. This is where you can let your imagination run wild and come up with unique ways to make your pics stand out.
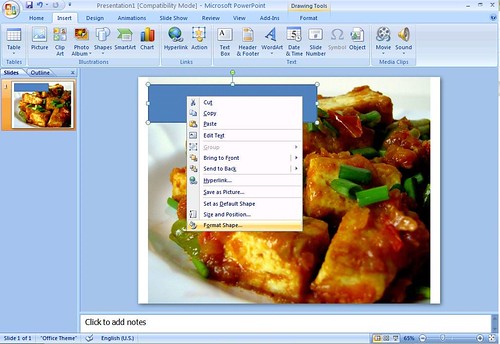
6. We have the basic shape in place, so now its time for the fun part! The first and most important thing is to adjust the transparency of this box so that it doesn’t look like its blocking out a part of the picture.
To adjust transparency,
Right click on picture –> Format shape
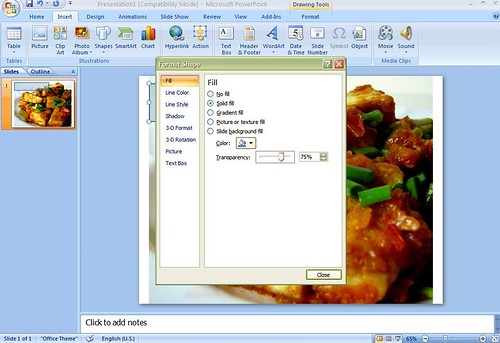
Choose fill from the left hand side and move the transparency slider to the right. I have chosen 75% here.
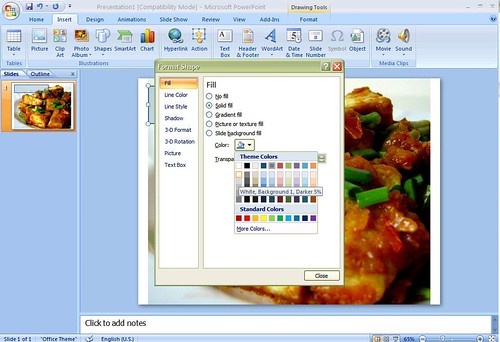
You can also change the colour of the box (just above transparency slider) to match your picture (shown below)
2003 users, right click on the picture. If I remember correctly, you should see an option to ‘Format Picture’. If not, use the Format menu option and choose picture.
7. Next step that’s quite small but significant is to change the outline properties of the box. Ppt 2007 automatically chooses a blue box as we saw above and changing the fill colour and transparency still leaves the outline of the box in a dark blue.
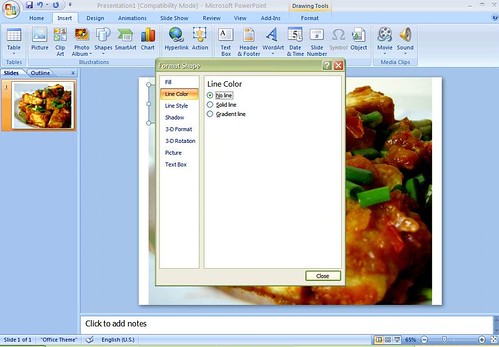
To change this, choose Line Color from the ‘Format Shape’ box as below.
You can either pick a different colour that matches the box colour above ..
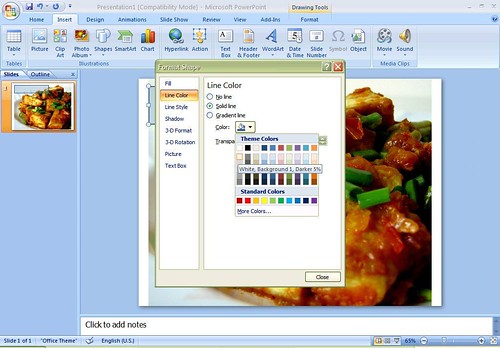
.. or choose ‘No Line’ so that the box just becomes seamless (the outline matches the colour of the box). This is the option I always choose.
Here is our what we are left with. I still remember how excited I was the first time I did this!

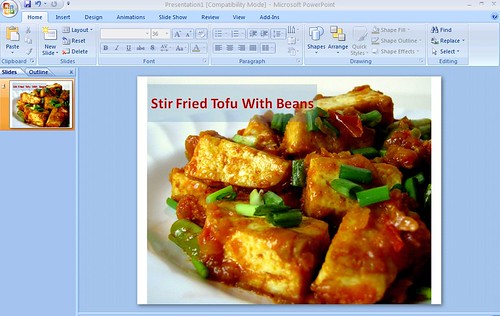
8. To add text, just click on the box and start typing. Ppt 2007 defaults the text to a dull white.

The options to edit the font are endless. Choose a font and colour you feel complements your picture the best.
I chose a boring maroon and an even more boring font because I was a bit tired of taking screenshots. Forgive me.
9. We are almost done! Let’s save the file. Since this is a powerpoint presentation currently, you will need to save it as a picture. For this,

Click on the windows icon in the top left corner and choose Save As –> Name your file and from the drop down below it, choose JPEG format.
For 2003, its File –> Save As..
Voila! Done!!
10. But wait, your picture has that white space on both sides, right? No worries.
Open it in Picasa.. (notice the white bars on both sides?)

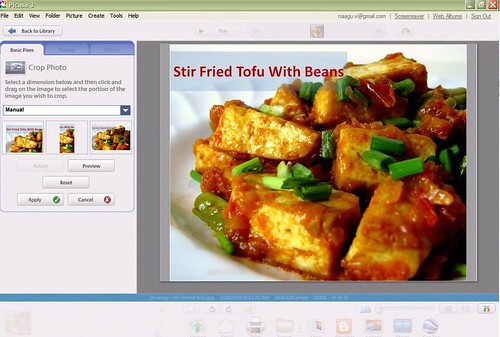
Go to File –> Save as and save your cropped file.
You will feel really happy when you open your saved file and see this! Especially if you are doing this for the first time, trust me!

I know this sounds like a lot of steps but if you know your way around in powerpoint, its really not hard.
Please let me know your thoughts on tutorial and if I have made any silly mistakes in the 2003 instructions. I would appreciate it if any of you who have Ppt 2003 can let me know the exact options to do the steps.
Some of the screenshots may be fuzzy because I used the age-old print screen option. I do funny things when I am tired or lazy or cranky.
For previous posts in the Food Photography Basics series, please click HERE.
As always, if you try this out, do drop a line in the comments and I would love to see it!
Hi Nags thank for the tutorial and everything that you wrote on your website.. so help full..
If you mean the facebook like button, i do have that alongside stumbleupon and google+ buttons 🙂