
You know sometimes you try something new and you wonder to yourself “why on earth did I never come across this gorgeousness before?”
Well, this is one of those recipes. Its from a brilliant book called A Passion for Baking by Marcy Goldman . Its uber simple and all you need is 4 ingredients. Yes, that’s right! 4 ingredients and you can whip up these bars and I guarantee ‘wows’ from your friends, family, guests, dog, whoever.
Toblerone Candy Bar ShortbreadMakes about 15 -18 barsAdapted from: A Passion for Baking by Marcy GoldmanIngredients:1 cup butter, at room temperature(I used salted butter. If using unsalted, then add a pinch of salt to the flour)2/3 cup sugar2 1/4 cups flour100gm Toblerone chocolate bar, at room temperature
How To Make It:
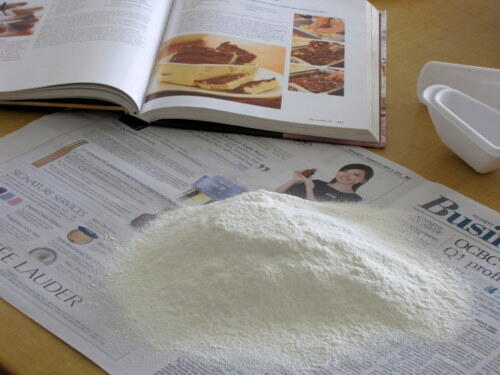
Preheat oven to 325F / 165 C. Sift flour (and salt if using unsalted butter). This sifting business is optional by the way, I just like to do it so that its easier to fold into the wet part of the dough.
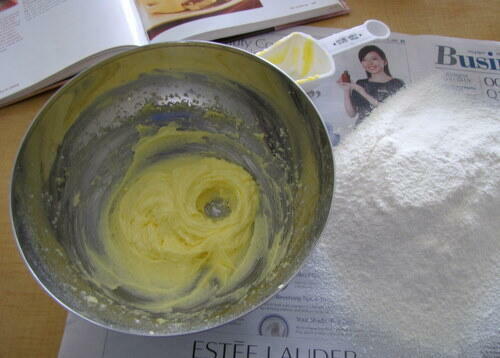
Cream the butter and sugar until soft. You can use a whisk and do this by hand.
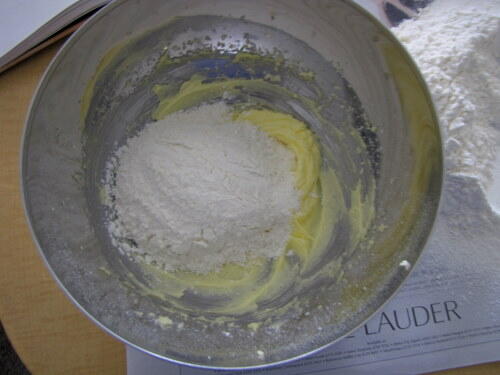
Dunk in the flour
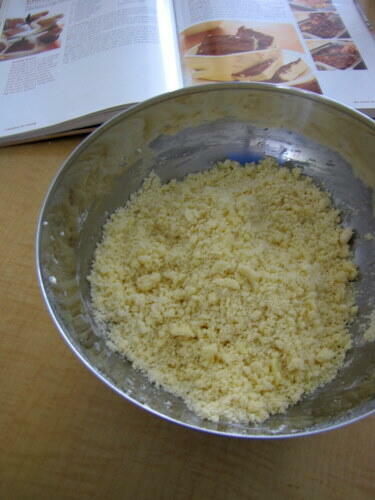
Gently mix with fingertips until the mixture resembles bread crumbs
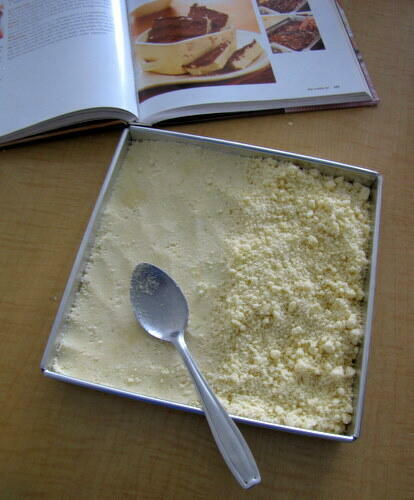
Pat firmly on to a brownie tray or the flattest baking pan you have. Make sure that this layer is not more than 1 to 1.5 inches high. Press with the back of a spoon to layer it firmly.
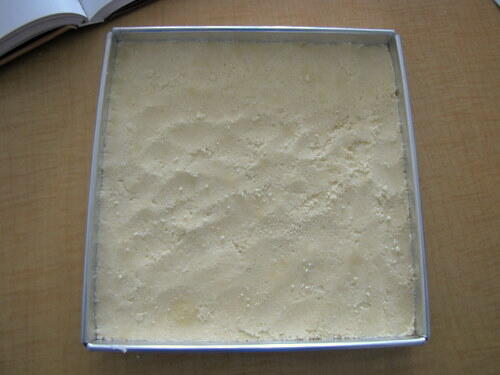
Bake in the pre-heated oven for 15-30 mins or until the top turns a light golden brown.
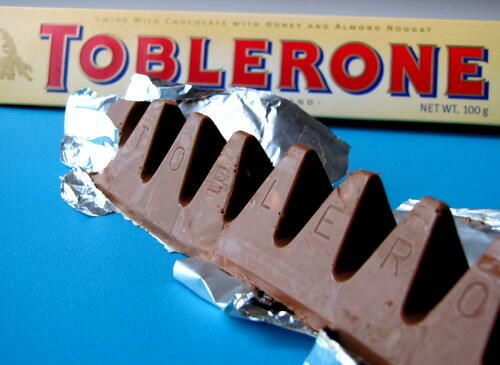
Meanwhile, bring out your Toblerone bar. Make sure its at room temperature. Due to the heat in Singapore, mine was squishy – and that’s perfect!
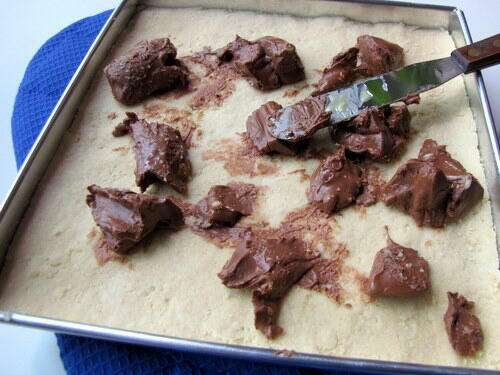
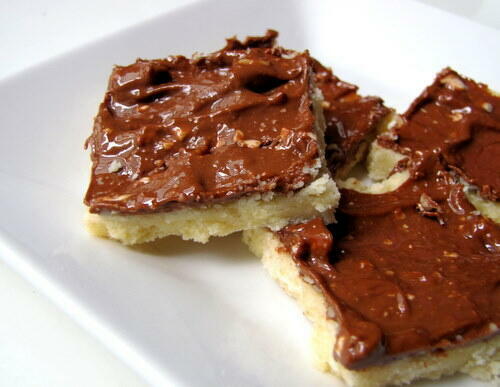
Once the base is baked, while its still hot from the oven, chop the Toblerone bar and sprinkle over the base.
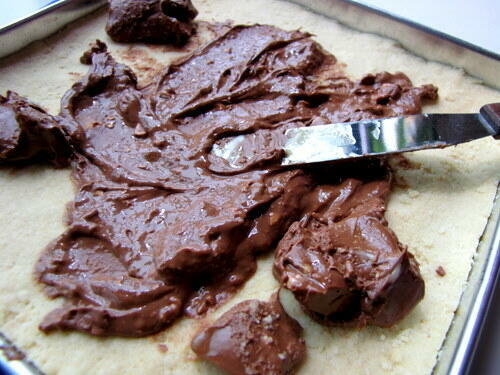
With an icing spatula or a flat spoon, spread the chocolate evenly over the baked base.
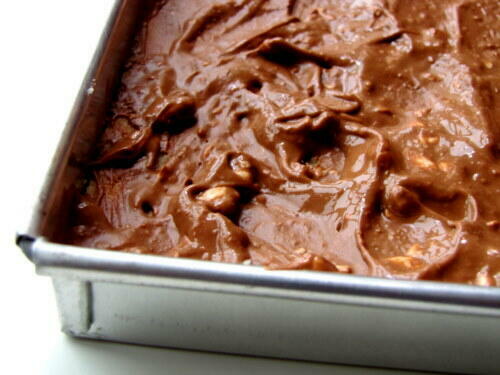
Cool completely. Using a knife, mark squares so that its easier later to cut them along these marks, when the bars are set.
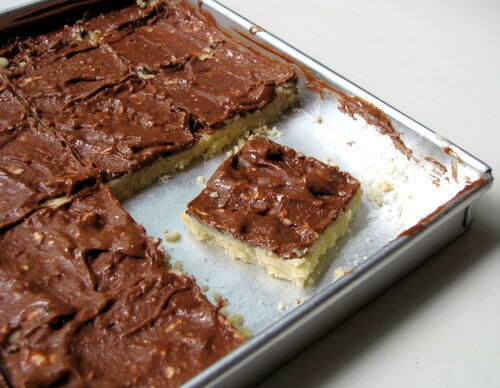
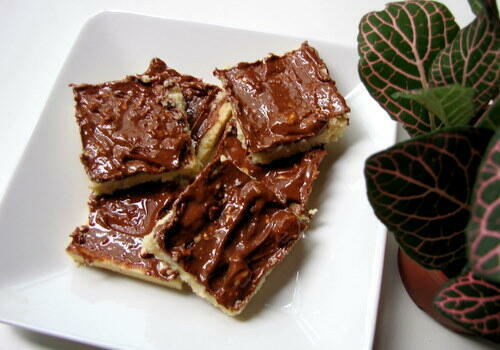
We are done! Transfer to the refrigerator to set. Once set, cut along the pre-marked lines into square bars and serve. Store in refrigerator so that the chocolate doesn’t get runny. I kept mine in the fridge for a week.
The reason why Toblerone works perfect for these bars is beacause of the nougat and cashew pieces in the choclate bars. It gives a surprise element when you bite into the bars! But I am definitely going to experiment with other chocolates too.
Drop me a line if you do try this! Would love to hear from you 🙂
Wow, these bars looks delicious! I always think of that episode of Friends when I see Toblerone! I think we can safely say that Joey would love these desserts too! Keep up the great work!
~Sophia
http://www.chewonthatblog.com
I've got to try this, Nags. My daughter loves shortbread and adding Toblerone to it could only make it better for her!
Now that's awesome shortbread! Yumm!
My son loves those Chocolates, looks so delicious Nags. Enjoy. We have 3 day holiday, see you next Tuesday again!:))
Hi Nags, I am here for the first time. Love at first sight should I say. Super shots and so yummy clicks. Making me drool here.
I love the step by step procedure, very easy for beginners too. Will try this some day.. I actually love to become a follower of u, but do not see any links to do so. Can u pls help me out.
Looks delicious….step by steps pics always helps 🙂
Self-restraint is not my virtue when it comes to chocolate n am sure this dainty little thing will be finished by me if i make 🙂 nice n easy one nags 🙂
It looks sweet and delicious…
this looks delicious,..lovely pictorial too
Looks wonderful and sure the taste is delicious too!