
I am also going to say this up front before you read through the whole recipe and get disappointed. You need Biryani Masala to make this recipe. Its not one of those grind-your-spices-fresh type of recipe because that would make this a non super quick dish, and today we are all about super quick.
Its also a prerequisite to like cauliflower inorder to enjoy this dish.
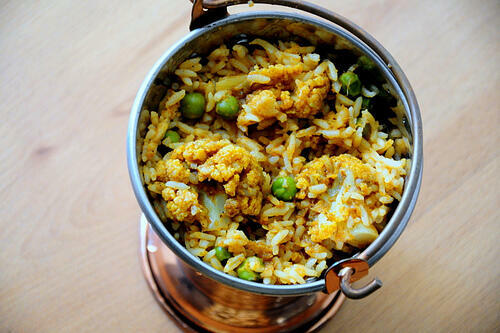
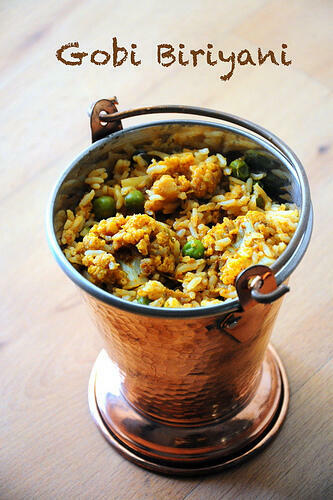
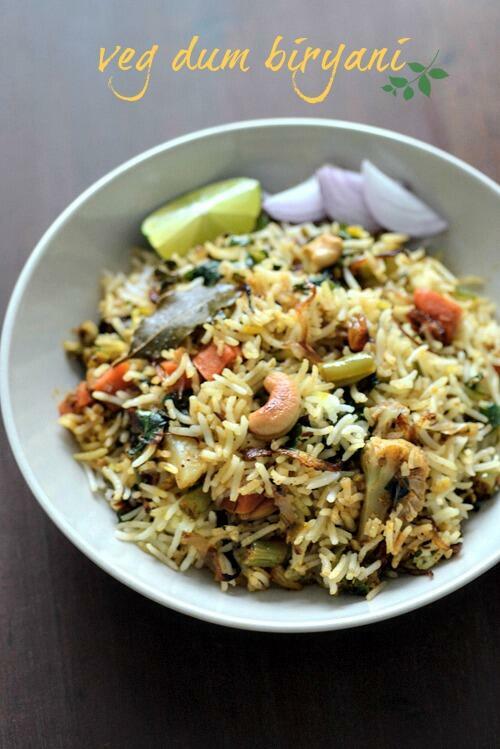
Gobi Biryani / Cauliflower Biryani Recipe
Serves 3
Ingredients:
1.5 cups basmati rice (or any long-grained rice)
1 large onion + 2 green chillies, ground to a paste
1 large tomato, pureed
A handful of green peas (fresh or frozen)
1 medium sized cauliflower, washed and cut into florets (around 4 cups)
1 tablespoon ghee (or oil)
Fresh chopped coriander leaves for garnish (optional)
The Masala
½ teaspoon jeera / cumin
1 teaspoon dhania / coriander powder
A pinch of turmeric
1 teaspoon ginger garlic paste
1 heaping tablespoon of biryani masala![]()
Salt to taste
How to make Gobi Biryani:
1. Cook the basmati rice in 5 cups of boiling, slightly salted water until cooked but still firm. Set aside.
2. Heat the ghee in a pan and add the onion-green chilly paste. You can also slice the onions and chillies and add it that way but I felt like grinding it so I did. Fry the onion paste for about 2 mins. It will start losing moisture and get thicker.
3. At this stage, add all the masala ingredients in the order given. Fry well for about a minute till it starts smelling gooood.
4. Add the tomato puree, peas and cut cauliflower florets. Give it a good mix and cook closed on low fire until the cauliflower is cooked soft, yet retains its shape (about 5-7 mins). You can sprinkle some water if you feel the mixture is getting too dry.
5. Once done, check salt and then mix in the cooked rice gently until well combined. Garnish with chopped coriander leaves and serve with any raita and papad.

The preparation time for this biriyani is significantly less because you are not pounding any masala last minute. Depending on what biriyani masala you use, you will get a distinct flavour each time - I love that variety!


LambAround
I can't wait to try this! I bought a cauliflower earlier this week and have been browsing for a great recipe to use it in. Thanks 🙂
Priya Sreeram
nice recipe-i too make somethg like this with available veggie
Alisa
What a delicious recipe! And I love your presentation too.I followed you from the foodieblogroll and I'd love to guide Foodista readers to your site. I hope you could add this cauliflower widget at the end of this post so we could add you in our list of food bloggers who blogged about recipes with cauliflower,Thanks!
Usha
That is a cute bucket!
Shanavi
Job well done yaar..I simply loved the way u putforth for making this yummy biriyani
Nostalgia
Looks good!
Priya (Yallapantula) Mitharwal
First of all, I think I may have already mentioned, but I love your cute copper bucket. Where did you buy it from?
And, wow love your biryani as well 🙂
Saee Koranne-Khandekar
I think biryani is like fried rice--in that you can make it with whatever you've got in the fridge. Yours looks yum. Would love it with a crunchy red onion raita!
Anonymous
This sounds very good. I have Sunetra Humbad's cookbook (Indian Vegetarian Cooking In Your House) & whenever she adds a paste to the oil, she says to cook until the spices begin to separate from the oil. As a non-Indian cook, I like the visual aid in knowing when to move on to the next step.
I very much like your blog & photos. Thank you so much!
Honey
Wow, this looks so good. My mom makes this dish quite often without the biryani masala. I love your picture and I love those copper dishware, it's so mughlai, love it.