
I have been putting away this Gobi Paratha Recipe post for the longest time possible. I made these Gobi Paratha over a month back and took step by step pictures. I was too lazy to edit and upload and post so kept picking the simple recipes to post. Today I had to share this with you because I tried making layered gobi paratha in a different way and it was so much better than the traditional method of making the paratha, addng the filling, bringing the edges together and rolling it out again before cooking it on the tawa. I have given the shots of the usual method below. More Paratha Recipes on Edible Garden!

Now for the different method I tried, you have to endure the whole post 😀

Recipe for Gobi Paratha Filling
How to Make Gobi Paratha Filling:
Make lime-sized balls and divide each ball into two, like below. Now, for all those smart ones who ask “why can’t we just make smaller balls instead of making a big one and dividing into two?” the answer is: we need the two halves to be of the same size because we are going to roll out the halves and then superimpose them with the filling in between.
INGREDIENTS:
INSTRUCTIONS
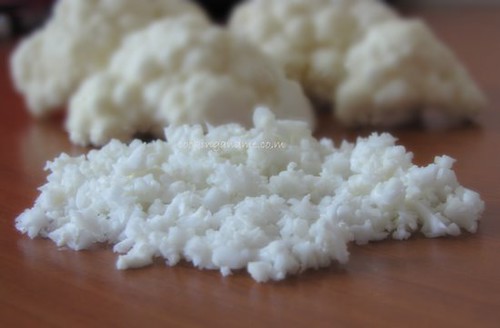
Let’s start with 1 cup minced cauliflower or gobi. Make it as tiny as possible. Like this.
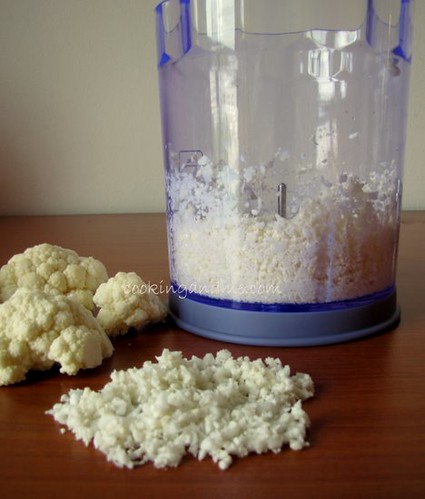
I recently got a Philips chopper/blender/whisk set and used the chopper blade to get it minced. Its super quick and I use this for pretty much all my chopping now.
Recipe for Gobi Paratha Filling
Minced cauliflower – 1 cup
Onion – 1/4 cup, minced
Garam masala – 1 tsp
Cumin / jeera – 1/2 tsp
Red chilli powder – 1/2 tsp
Ginger garlic paste – 1/2 tsp (optional)
Oil – 2 tsp
Salt – to taste
How to Make Gobi Paratha Filling:
Heat oil, add the jeera and when it starts spluttering, add the minced onion and fry till golden brown. Next add the ginger garlic paste, garam masala and the chilli powder. Mix well with salt for a few seconds. Then add the cauliflower, sprinkle some water and cook covered on sim for about 10-12 mins. The cauliflower should be cooked well by now.
It should like this at the end. I added some crumbled paneer for good measure. You can add some chopped coriander leaves as well. I just didn’t have any.

Make lime-sized balls and divide each ball into two, like below. Now, for all those smart ones who ask “why can’t we just make smaller balls instead of making a big one and dividing into two?” the answer is: we need the two halves to be of the same size because we are going to roll out the halves and then superimpose them with the filling in between.
Ok let me show you that. Let’s start with halving each lime-sized dough ball.
Step by Step Pictures for Making Gobi Paratha:

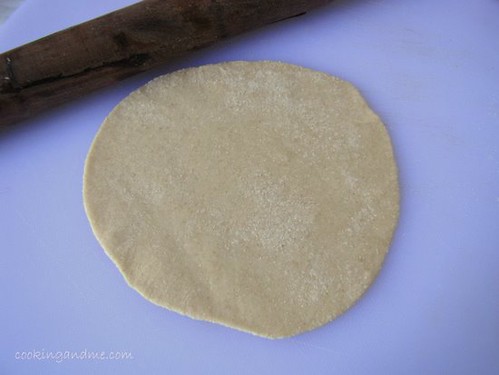
Then roll out each half. I know this is not a perfect circle. I like it this way.
Ok I admit, I can’t ever get a perfect circle. You caught me. I forgot this is why I never take step-by-step pics while making rotis or parathas. Well, too late now. Damn!
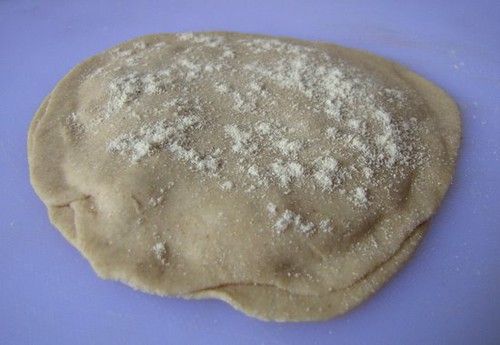
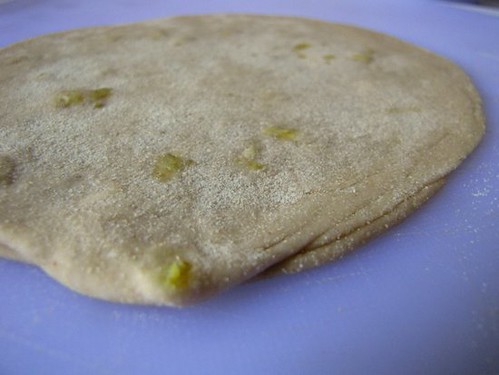
Once both the halves are rolled out, spread some prepared filling on one half..

and super-impose it with the other half. Like so.
I know I haven’t done a perfect job of super-imposing either but I am going to ask you to stop finding fault if you genuinely want to learn how to make gobi parathas. Great gobi parathas!

I should probably hook up some studio lights in my kitchen. I so wanted to show off how well they fluffed. Anyway..
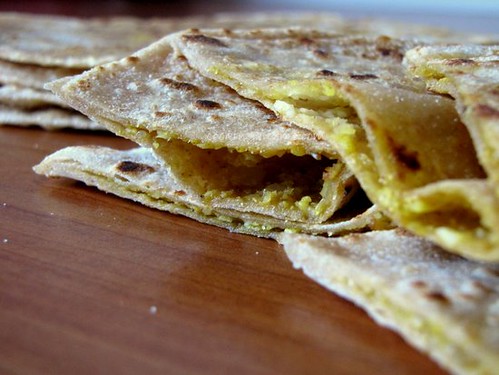
See how lovely the filling looks inside once they are done? I didn’t add any extra oil while cooking. The filling gives out some and that was enough for me. If you want, go ahead and indulge by dabbing the cooked parathas with some butter while they are still hot.

Here is the recipe with measurements again in case it was lost up there among all those pictures.
Gobi Paratha Recipe
INGREDIENTS:
For the dough:
3 cups atta/whole wheat flour
1 cup and a bit more water
Salt
Mix in the salt and add water little by little to the atta to make a firm dough. Let it rest for about 30 minutes.
For the filling:
Minced cauliflower – 1 cup
Onion – 1/4 cup, minced
Garam masala – 1 tsp
Cumin / jeera – 1/2 tsp
Red chilli powder – 1/2 tsp
Ginger garlic paste – 1/2 tsp (optional)
Oil – 2 tsp
Salt – to taste
INSTRUCTIONS
Heat oil, add the jeera and when it starts spluttering, add the minced onion and fry till golden brown. Next add the ginger garlic paste, garam masala and the chilli powder. Mix well with salt for a few seconds. Then add the cauliflower, sprinkle some water and cook covered on sim for about 10-12 mins. The cauliflower should be cooked well by now.
Ok this time around the paratha came out well !! Thanks for the super awesome blog post nags !
superb…you way of teaching…with foto…really..!
Fantastic display!!
Hi, this was awesome… My fellow North Indian roommates, do it just like that… I tried this with your help, it came out really well… My family loved it, I couldnt believe that I made it 🙂