
For your reference, here are the first four posts in the series:
1. Food Photography Basics
2. Aperture, F-Stops and DOF (Imp!!)
3. Basic Editing with Picasa 3
4. Using the Right Bowls, Plates & Colours
Q: I read in your previous post about blurring backgrounds by controlling the aperture. I tried doing this in my camera but I can’t figure out how to change the f-stop value. Help!
A: I really wish I could take a look at your camera to help you with this. In all likelihood, I would give you a blank look back and go Google your camera model to see how its done, but either ways, its hard to help you with a setting in your camera when I can’t see it, even if I know the make and model.
The most likely case is that your camera doesn’t allow manual aperture settings. The best way to figure this out would be to bring out your camera manual and look it up. Yes, look up that dull, thick book that you got with your camera that has instructions in 33+ languages.
A Google search should also help. I would recommend dpreview. Its a pretty cool site that has information and reviews on almost all cameras available out there. If you look around a bit, you should also be able to find online manuals for your cameras.
Q: I found the apeture setting on my camera and set it to f 3.0. But I am still not getting a blurry background like you said. Did you lie?
A: No I didn’t lie. Really.
Even if you set your aperture and your shutter speed and a dozen other thingamajings in your camera, your picture still heavily depends on one thing – Light. How much of it is there or how little, what time of day it is, are you using flash or not (you shouldn’t be, ever! Never ever!), etc.
Once you have set your aperture setting at the lowest, make sure you have macro on, make sure there is tons of light coming in from somewhere, get close to the food and click away. It also helps if you have some stuff in the background as opposed to just a wall or a coaster. That will help you see the effect better.
For example:
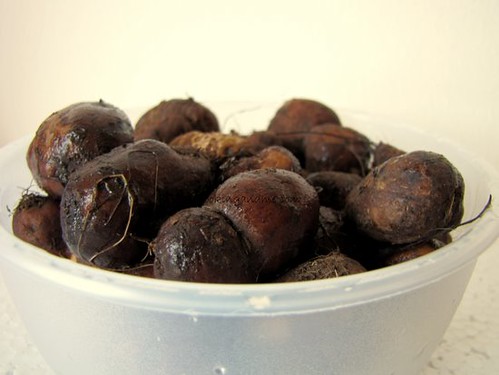
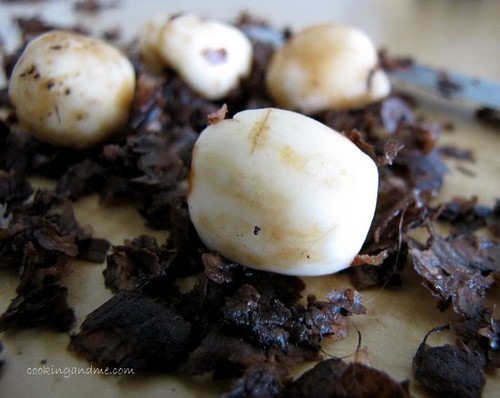 Now, in this picture, there are a few yams spread out in the frame and you want to focus on one while blurring the others in the background. This is a good way to lay out your food while testing the aperture setting and macro and what-not on your camera.
It takes practice and again, I wish I could do a demo or something, but what I would keep on saying until you get sick of me is, use as much natual light as possible. Open that window, sweep out that balcony and set up a stool there, click away.
If you still think I am lying, wait for my post next week on how to blur your backgrounds using Photoshop. Its not hard. I swear.
If you want to keep up with the Basics of Food Photography Series, you can subscribe to my RSS feed here or via email here.
Thanks guys! I am so glad its helping 🙂
hi Nags, awesome that you take such efforts in getting back to everybody…! cant wait for the next post:-) would love to have some of that patience and passion:D
Perfect posting, you encourage and teach everyone.. this is really a divine thing. i appreciate that..
I love this. You know what? I’m going to compile all that you said and put it up on the fridge and master it, so that I will internalize it 🙂 THanks man!
Thanks for so many tips and tricks on photography,I have learnt many things so far..Appreciate you effort.
Great post, could use some tips as always.
I made your Brinjal in shallot and coconut sauce, posted at FH. It was yum, thanks for the recipe! 🙂
That’s quite an informative post … am still going thru your other infos. 🙂
I agree .. natural light is the best. Am still learning the nuances of good photography .. but have always found the super macro a big help in this matter. Looking forward to your next post on this. 🙂
Thanks for all the info, Iam in the process of learning and would like to learn more from your tips. Thanks again.
Hmmm..still sounds like Greek to me.I remember those days in school when the teacher explained one biGGGG math problem and I absolutely had no doubts..no prizes for guessing that I couldnt make out head or tail from it…this sounds quite similar to that!!But hats off to you for explaining it all oh-so patiently..waiting for the next one in the series!!
Appreciate your efforts behind this. I am sure many like me are benefitted through this.