
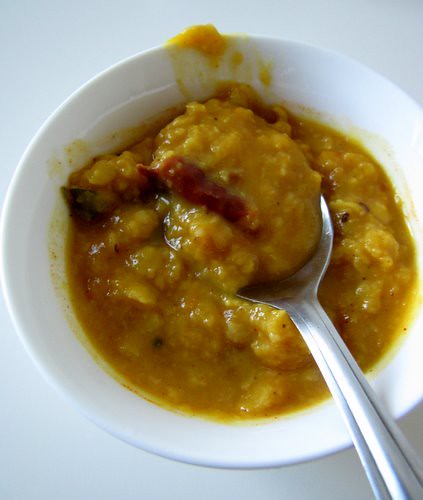
How to make Dal Tadka (Dal Fry)
Dal tadka or dal tarka is one of the easiest and most popular dal recipes in India. It’s usually made with masoor or toor dal and mashed up with rice to make an easy and tasty meal that’s rich in protein and carbs. While every household makes dal tadka differently, the basic ingredients remain the same – dal cooked and mashed, spices added, and tempered. The tempering is the most important part and even lends name to the dish – tadka means tempering in Hindi.
While this is not a very popular style of making dal in Kerala, I figured this is useful for those who are away from home and looking for a simple dal recipe to satisfy their cravings and comfort their homesickness.

I had used the pictures of this recipe for one of my photography series posts – angles in food photography. Like I mentioned in that post, sometimes the simplest of dishes can make a great meal, like we enjoyed that weekend. I just wanted to jot down the recipe here for those of you looking for a comforting bowl of yellow dal for your dal chawal.
You may also want to check out other popular dal recipes like jeera dal, dal panchratan, and dal makhani. Browse all dal recipes here.
Yellow Dal / Dal Tadka / Dal Fry / How to Make Dal
Ingredients for Dal Tadka:Toor dal – 1 cup(you can also use masoor dal / red lentils)Tomato – 1, cubedTurmeric powder – a pinchAsafoetida / hing – a pinchAmchoor / dry mango powder – 1/2 tsp(if you want it tangy)Sugar – a pinch (optional)Salt – to tasteFor Tempering:Onion – 1/4 cup, chopped fineGarlic – 3 pods crushed (optional)Jeera / cumin seeds – 1 tspDry red chillies – 3 to 4, halvedMustard seeds – 1/4 tspOil – 2 tspFor Garnishing:Chopped fresh coriander leaves (optional)How to make Dal Tadka:1. Pressure cook the dal, tomatoes and turmeric powder with 3 cups water. I cook it usually for 4 whistles since it takes longer to cook dal in Singapore. 3 whistles should usually be enough. If you don’t have a pressure cooker, cook in a closed, thick-bottomed pan for about 20-30 mins until the dal is cooked soft.2. Heat oil in a pan and add the ingredients for tempering. Once the mustard seeds start to pop and the onions turn transparent, add the cooked dal.3. Next, add salt, hing, sugar and amchoor and mix well. If the dal is too thick, add some water. If too watery, let it remain on fire for longer until the desired consistency is reached.4. Garnish wtih coriander leaves and serve with steamed white rice, papad and pickles. YUM!
NOTE:
You will see that a lot of ingredients I add are optional. This is because the basic yellow dal recipe is plain and simple with minimum flavours. Customize according to your taste and use just the bare minimum ingredients. It tastes great any which way. Serve hot with rice and and a dollop of ghee.
hello!
dh just bought me an instant pot pressure cooker. so i took to the web for recipes and found your blog. i’m super excited to try several of your recipes. but, also nervous. i’m not a cook. my pressure cooker is not yet my friend and it doesn’t whistle. i have no idea how long to pressure cook things in whistling time! is 3 whistles 10 minutes? 20? is it possible to include “real time” and whistle time? 🙂 thanks so much for sharing your recipes.
That’s a great suggestion! Congratulations on your new pressure cooker 🙂 The time for 1 whistle will depend on multiple factors like size of pressure cooker and the intensity of heat being used. In that sense, giving whistling time is not a good measure of time at all. I’d say it’s safe to go with 1 whistle = 7 minutes.
Wow! Tat was an awesome dish. I tried it today and everyone liked it 🙂 Thanks for sharing Nags.