

TH and I were due to visit my cousin for lunch. A cousin with two kids. Which meant, we should be getting them something.Fruits? Nah. Reminds me of visiting someone at the hospital.
Chocolates? I am a bit careful when I get this for kids because I know parents who don't introduce chocolates to their kids until they are about 10 or so. Yeah, really. Though I am super glad my parents didn't think of something like this, I respect these parents' decision.
That's when I decided to play it safe and bake something myself. TH may disagree about the 'safe' part but who listens to him anyway, right?
So I decided to bake these lovely butterscotch blondies. This is a step-by-step recipe, my first one inspired by Zesty Cook. These blondies are quite foolproof and really yummy, not to mention a great variation from the usual chocolate brownies!
The best part is, the recipe doesn't involve any kind of whipping, or beating, or creaming, or other complicated baking techniques. This is best suited for baking beginners. So this is for all those of you who are looking to bake something simple and easy.
Other easy baking recipes for beginners:
Pecan pie bites
Eggless brownies
Chocolate pressure cooker cake
Butterscotch Blondies Recipe
Ingredients
- ½ cup butter melted
- 1 cup brown sugar
- 1 egg
- 1 teaspoon vanilla extract
- 1 cup all-purpose flour
- ¾ cup butterscotch chips
- 1 pinch salt
Instructions
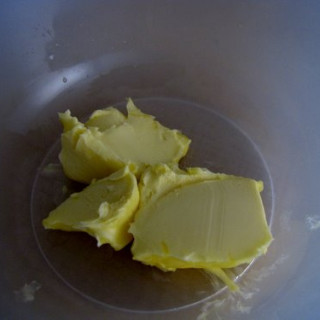
- Cream the melted butter and sugar until well blended.
- Add the egg and mix well. Then add the vanilla extract.
- Dunk the flour and salt in. Mix well until combined, with no lumps.
- Add the chips and mix gently.
- Transfer to a greased cake tray to a pre-heated oven at 350 F / 175 C and bake for about 30 mins or until a toothpick/skewer comes out clean.
- Cool, cut into squares, and enjoy!

 Next, let's measure 1 cup brown sugar.
 Mix throughly. You don't need any fancy electric beater or anything for this. Just good old mixing with hands until well blended.
 Next, add an egg.
 Mix well, gently, until you get a nice watery batter like this that's ready for the flour that you are going to add in next.
 But wait! Before we measure out the flour, let's add 1 teaspoon vanilla extract/essence to this and mix well.
 Finally, its time for the flour. Measure out 1 cup of all purpose flour. I just dunked the whole thing in. Don't forget to follow the flour with a pinch of salt.
 Mix well until the flour is well combined with no lumps.
Now, its time for the star ingredient - Butterscotch Chips!
 I didn't find any in the baking supplies store near my house but they had these cute butterscotch drops that were really tiny chips of caramel, so I used these instead. We will need ¾ cup of chips.
 Dunk those in too, and blend gently without mashing the chips too much.
 There you go. We are done! Well, almost. This is when you call your husband over to help transfer the batter to a greased cake tray so that you can click that as well. Like so.
 Of course, you have to do the spreading and making it look pretty bit.
 Transfer this to an oven pre-heated at 350 F / 175 C.
 Yes, that's my oven. Its very old-fashioned but works like a charm.
 The one my mom owns doesn't have a temperature regulator, yet, she used to make the most amazing cakes, different kinds - not to mention puddings and other stuff too!
 Mine has a regulator and the highest setting is 220 C. I rarely need a hotter oven than that.
 The dome-like lid lets you take a peek into what's baking. You see those tiny holes near the edge of the glass disc? That's where I insert my 'toothpick' to check if my cakes are done. Though, when I say toothpick, I actually mean an extra long skewer!
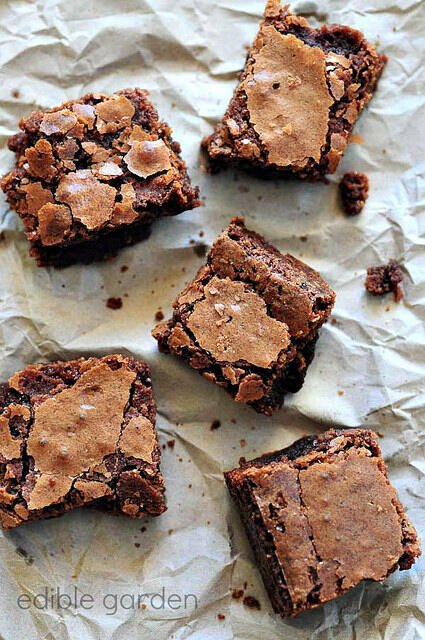
 After about 30-40 mins of baking, your butterscotch blondies should look like this. If you are anything like me, you would have to resist the temptation to just dig your hands in and remind yourself just in time that you baked these for your cousin and family.
It's quite easy after that. Cool, cut into squares.
Pack it in a container...
 .. and get ready for the compliments 🙂
Oh, this should easily get you about 12-15 squares if you use an 8 by 8 cake tray so you will have enough for yourselves too!

Ruchi
A cake recipe without baking powder or soda?! Wow.. and it looks nice and crumbly. This recipe makes me question the relevance of adding those leavening agents in various cake recipes. Could you please throw some light on this..?
nags
hi ruchi, this is not a cake recipe. blondies are like brownies but without chocolate. so it won't be soft and fluffy like cakes.